
“What is a Supergun?” I hear you ask. A Supergun is a device that allows arcade games to be played on a home TV rather than needing a large arcade cabinet. Essentially it contains all the arcade wiring and power supply in one small package. Having a supergun is very useful for testing jamma board or when doing repairs. They are available to buy on place like ebay, but they are mainly the cheaper and less reliable versions. At the other end of the range is the professionally made ones that can cost £150 or more. So I decided to make my own.
Building a Supergun
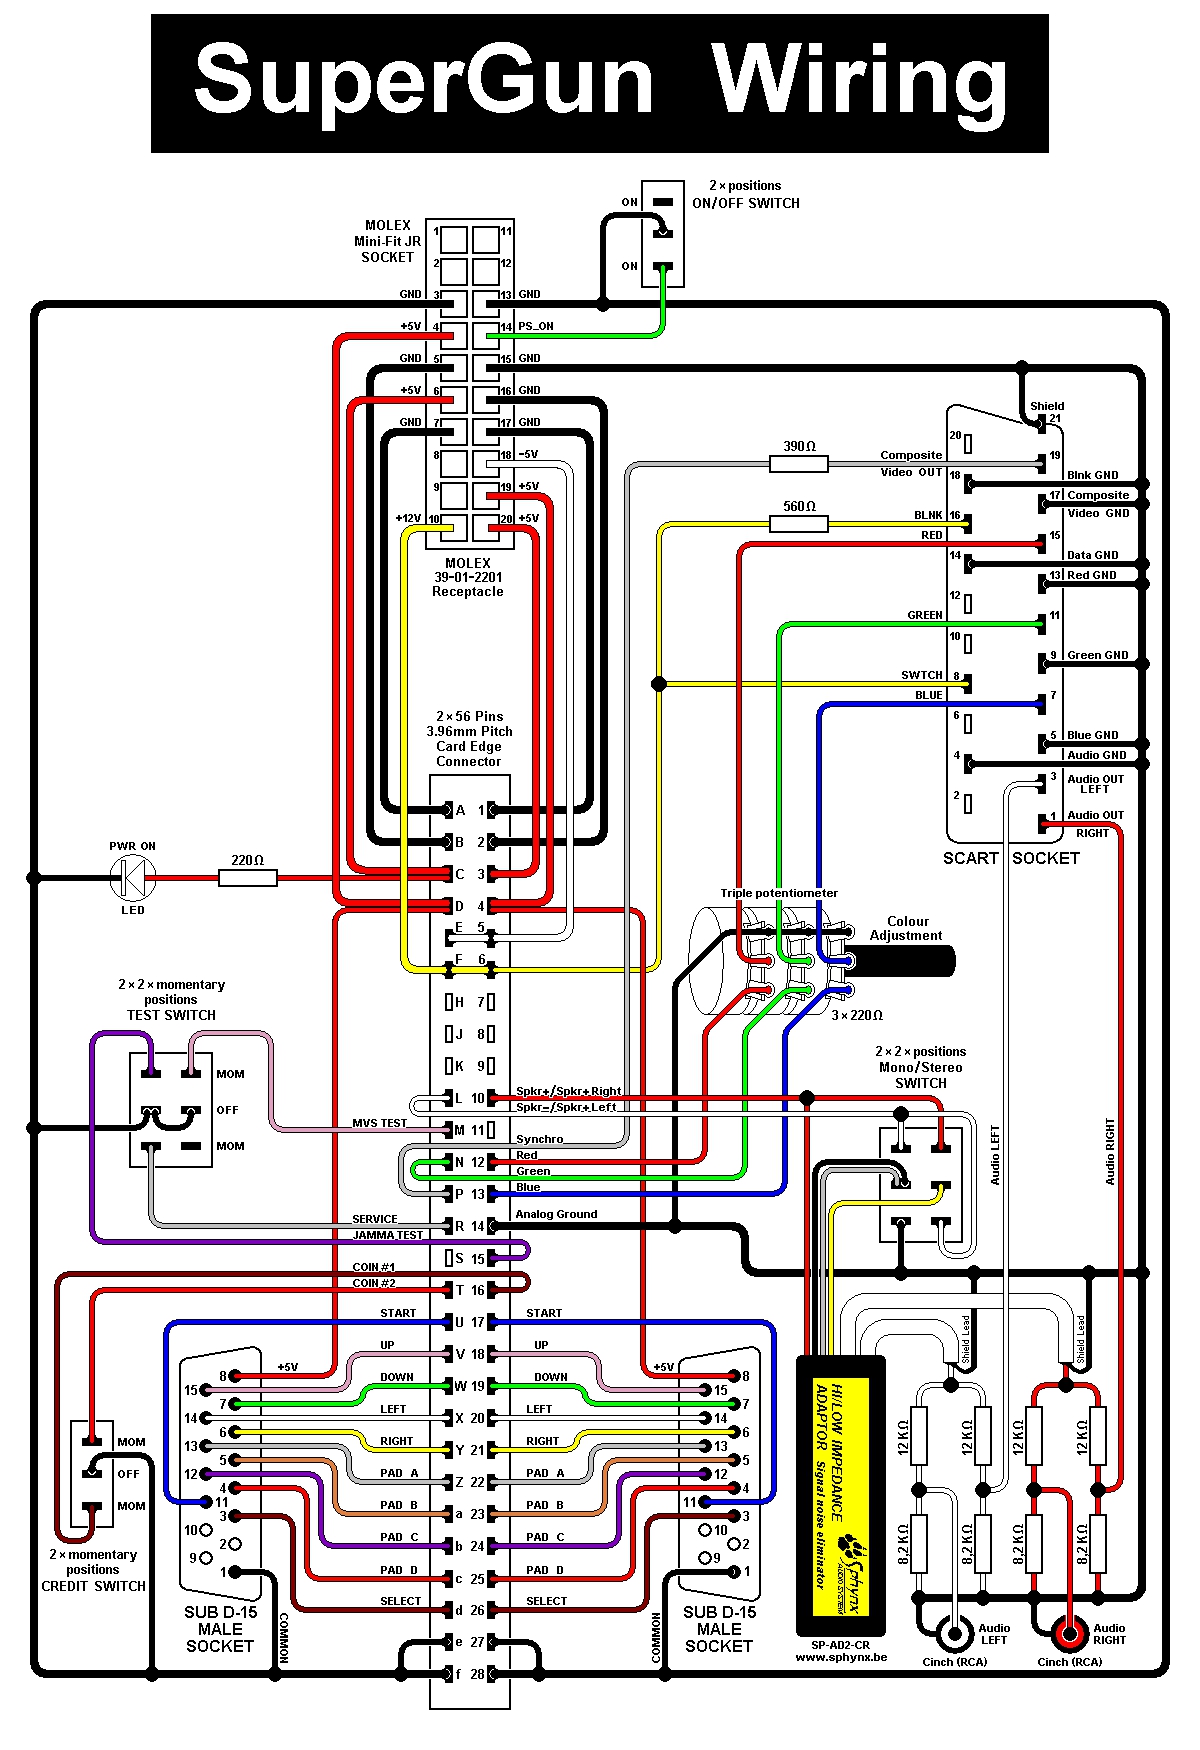
After some research and a few posts to the Assembler forum I managed to track down a “How To” guide made by Chad Gray. And this excellent wiring diagram. After investigating the possibility of using the ATX PSU from a miniITX computer setup (a dead end because of the lack of -5V) I salvaged the PSU from an old Pentium 1 SFF PC that was getting chucked out from work. As well as couple more for spares.
Power

|

|
Firstly I soldered the fuse holders onto the the board and the power lines from the PSU. The 5v uses a 10A fuse, and the 12v uses a 1A. This is to kill the power in the event of a game malfunctioning and getting damaged by drawing too much power.The 5v is mainly used for the game logic and memory. The 12v and sometimes the -5v line are often used for the audio amp.
Some systems like the Neo-Geo MVS have no need for the -5v, but its required in most jamma games.

|

|
The next stage was to connect the fused power lines from the PCB to the 56pin Jamma edge. I used about 40cm of wire to allow for plenty of flexibility to the harness.Each wire was also covered with heat shrink tubing to prevent accidental power grounding. It also gives a more professional finish to the job.
Video

|

|
Now for the video output system. I am using a new scart port which will be attached to the rear of the finished casing. I used 5v with a 100Ω resistor for the video Blanking Ground.
An RGB TV makes for the prefect arcade monitor and supports plenty of the standard resolutions needed for older arcade games and also consoles.
By this point the system could be started for testing.

|
Now its all coming together. I added the player control ports and credit buttons.
In this photo I am running the 1-Solt NeoGeo system (the game is Last Blade).
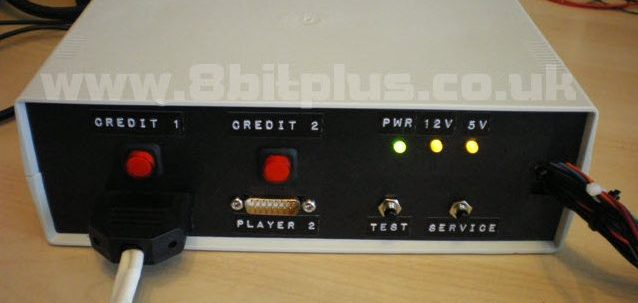
Another interesting point is the power LEDs. I attached one on the 12v and 5v lines after the fuses. This will indicate a blown fuse when the case is closed. The green LED just shows if the PSU is on.

|

|

|
I finished the Supergun with a two part plastic case from Maplin. As you can see there is plenty of room for the PSU and all the wires. I also added a Test and Service button to the front of the case. The Test button is used to access system menus to change settings and game difficulty. The Service button varies on function. For the most part it adds a test credit or free go without messing up any book keeping numbers.
I also included a CPS2 kick harness (not connected in that last picture) to allow for 6 button Capcom games.
Controls
The control system is wired to the Neo-Geo CD game pad standard, which is great for either Jammer or Neo pads. The only problem with this is that the SNK pads only have 4 buttons. Luckily there were a couple of unused pins in the DB15 scocket that can take the extra button functions.
Now I needed to get some game pads ready.
Joy Pads

|

|

|
I’ve always liked the Sega Saturn control pad for its simple 6 button layout. The first thing to do was strip out the original wiring and remove the logic chip from the centre of the PCB. I used wire from a network cable and soldered the wires to the corresponding terminals.
Finished
In conclusion the project went very well. The video output is strong and free from interference but sometimes a little too bright on some Tvs. To fix this I installed a 1kΩ pot on each of the colour lines. This allows for fine tuning of the colour balance and brightness. Also I added a 12v signal to pin 8 on the scart socket. Now the TV auto selects the correct AV channel.
Here is a short video of the finished supergun running Darkstalkers on the CPS-2.
Thanks for reading.
Neil 8bitplus.co.uk
Can you build me one???
Please
I will pay you
Is supergun for sale
??
And is it compatible with pandora box cabinet 99 games in 1??
Please help
Is supergun for sale??
And Is it compatible with Pandora box 99 games in 1???
Please help
Hi. I made that supergun over 10 years ago. Not sure where it is.. Sorry not for sale.
I bet it would work fine with the Pandora.
Can you build me one please I will pay you
I live in michigan USA
No sorry. That’s a huge job and I don’t have the time to spend on a job like that along with all the other console repair work I’m doing.
I’d recommend a ready made supergun from eBay.